

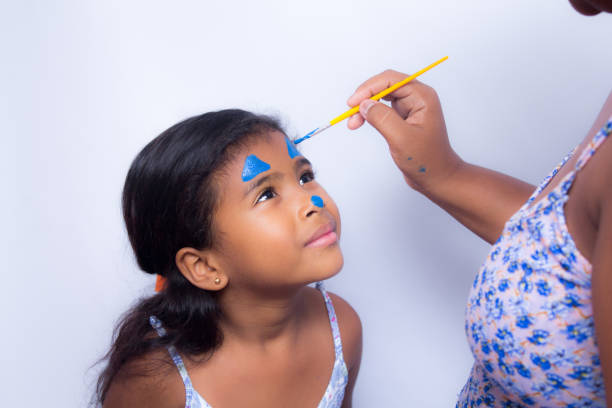

So, you’ve volunteered to run the face painting booth at the school gala, or maybe your kid just looked up at you with big, hopeful eyes and asked to be transformed into a ferocious tiger. Suddenly, panic sets in. You aren’t Picasso, and the last time you picked up a paintbrush was in high school art class.
Take a deep breath. You don’t need a fine arts degree to create face painting magic. With the right tools and a few simple techniques, you can go from “absolute novice” to “neighborhood favorite” in no time.
Here is your foolproof, stress-free guide to beginner face painting.
1. The Starter Toolkit: What You Actually Need
Before you touch a brush to skin, you need the right supplies. The biggest mistake beginners make is using the wrong paint. Never use acrylics, tempera, or washable markers on a face. They can cause nasty allergic reactions.
Invest in a small, high-quality, water-based face painting kit. Here are the essentials:
- Water-Activated Face Paints: Brands like Snazaroo, Diamond FX, or Tag are affordable, skin-safe, and wash off easily with soap and water.
- High-Density Sponges: Essential for covering large areas quickly and smoothly. Cut them into halves or quarters for better control.
- Brushes: You only need two to start: a medium round brush (for lines and swirls) and a flat brush (for thick lines and filling in shapes).
- A Cup of Water and Wet Wipes: For rinsing brushes and fixing inevitable mistakes.
2. The Golden Rules of Face Painting
Before diving into designs, keep these quick tips in mind to ensure a smooth experience:
- Damp, Not Drenched: Your sponge or brush should be damp like a wrung-out washcloth. If the paint is dripping or running, you have too much water. If it looks chalky or cracked, you need a drop more water.
- Work from Light to Dark: Always apply your lighter colors (like yellow or white) first, then layer darker colors (like black or dark blue) on top.
- Anchor Your Hand: Rest your pinky finger gently on the person’s face or shoulder to steady your hand while drawing fine lines.
3. Three Easy Designs Anyone Can Do
Skip the hyper-realistic lions for now. Let’s start with three crowd-pleasers that rely on simple shapes.
Design #1: The Classic Superhero Mask
Perfect for: Energetic kids who can’t sit still for long.
- The Base: Take a damp sponge with bright blue, red, or green paint. Dab it across the forehead, over the eyebrows, and around the outer corners of the eyes. (Avoid the eyelids to prevent irritation).
- The Outline: Use a medium round brush with black paint to outline the shape you just sponged on. Think sharp, angled lines like bat wings or lightning bolts.
- The Detail: Add a couple of white highlights or starbursts on the forehead to make the mask “pop.”
Design #2: The Sweet and Simple Butterfly
Perfect for: A beautiful, high-impact look with minimal effort.
- The Wings: Sponge a bright color (like pink or purple) on the eyelids and out toward the temples. Sponge a complementary color (like yellow) on the upper cheeks.
- The Body: Use your round brush and black paint to draw a small circle between the eyebrows for the head, a long oval down the nose for the body, and two antennae.
- The Frame: Use the black brush to loosely outline the colorful wing shapes. Don’t worry about being perfect—organic, curvy lines look best!
Design #3: Quick Cheek Art (The Ultimate Cheat Code)
Perfect for: Squirmy toddlers or long lines of waiting children.
If a full face feels too intimidating, cheek art is your best friend.
- The Rainbow: Use a flat brush to pick up 2–3 colors at once from your palette. Swipe it in a gentle arch across the cheekbone. Add a couple of white, fluffy clouds at the ends using a sponge.
- The Soccer Ball: Paint a white circle. Use a fine brush to draw a few black pentagons inside it, then connect the corners.
💡 Pro-Tip for Dealing with Wiggle Worms: Kids are inherently squirmy. If you’re painting a child who can’t sit still, ask them to talk about their favorite animal or movie. Keep them engaged, or ask them to close their eyes and count to ten while you do the trickiest lines.
4. Packing Up and Cleaning Up
When the fun is over, cleanup should be a breeze. Because you used water-based paints, a little baby shampoo or gentle face wash and warm water will take the paint right off.
For stubborn colors (like dark blues or greens), massage a little coconut oil or baby oil onto the skin before wiping it away with a warm washcloth.
Practice Makes Progress
Don’t expect your first try to look like a professional theatrical masterpiece. Your lines might be a little shaky, and your butterfly might look a little lopsided—and that is totally okay! Kids have incredible imaginations; if you paint a green blob with eyes, they will happily believe they are an alien.
Grab a kit, practice on your own arm (or a willing friend), and most importantly, have fun with it!